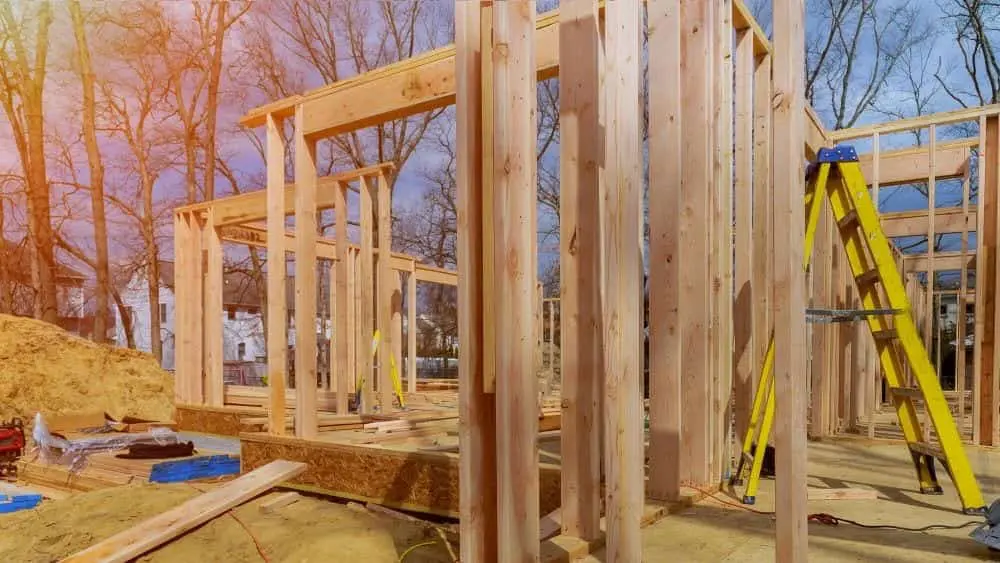
Building your new home is exciting, especially when you understand how the process works. It’s understandable that buyers are excited to see their new home built from start to finish says Chip Perschino, senior vice president of construction at Edward Andrew Homes.
“Our homeowners enjoy watching the home come together, from pouring the foundation to framing and watching the home take shape,” he says. “Once the home has drywall, they start to visualize themselves living in the space and how they’ll use it — imagining what furniture goes where and how they’ll entertain friends and family there.
“They spend a good bit of time designing the home to be unique to their family needs and tastes so seeing it all come together is rewarding for them,” Perschino says.
To help you prepare for and understand your new home’s construction, this article outlines the typical steps your builder takes during the construction of a new home and what happens at these key stages.
Keep in mind that the homebuilding process may vary from region to region and builder to builder, especially if you’re building an elaborate custom home. Be sure to ask your builder about their specific policies and procedures.
Before you start construction, you’re going to need a design. You can hire a custom architect or designer or choose from among thousands of pre-drawn designs at Houseplans.com. If you go the latter route, you may need to have some adjustments made (including engineering, stamping, etc.), which aren’t included in the cost, but you can still save time and money compared to starting from scratch.
“We encourage our homebuyers to make an appointment with their agent or project manager to come out and walk through the home at any stage,” Perschino says. “We suggest that it be by appointment to cut down on some of the safety concerns or limitations when a house is under construction. It also gives us a chance to offer a one-on-one conversation that may not be the same via email.”
1. Prepare Construction Site and Pour Foundation
Builder applies for and acquires permits.
Before a builder can put a shovel in the ground, the local government must approve the design and provide permits for everything from the zoning and grading (changing the contour of the land to accommodate your home and driveway) to the septic systems, home construction, electrical work, and plumbing. Once permits are acquired, physical construction can begin.
Construction crew levels site.
Often, site preparation and foundation work are performed by the same crew, but this may not be the case with a wooded lot. Using a backhoe and a bulldozer, the crew clears the home site of rocks, debris and trees and, if applicable, digs for the septic system.
Builder puts up wooden forms for the temporary foundation.
The crew levels the site, puts up wooden forms to serve as a template for the foundation, and digs the holes and trenches
Footings are installed.
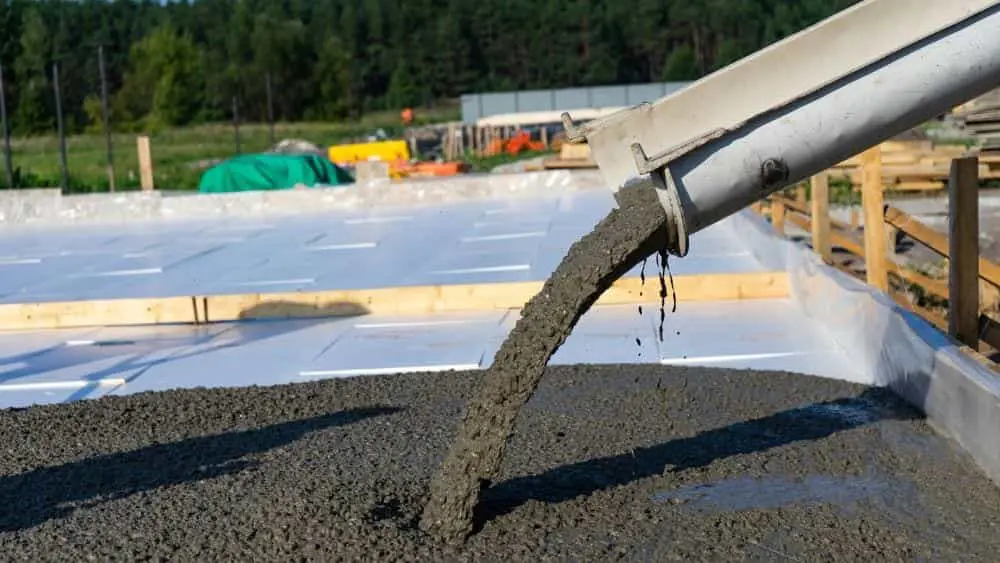
Footings serve as the ground support system (usually formed using poured concrete and rebar) to keep the home from sinking. If your home is going to have a well, it will be dug at this point. If the home has a full basement, the hole is dug, the footings are formed and poured, and the foundation walls are formed and poured. If the foundation is slab-on-grade, the footings are dug, formed, and poured; the area between them is leveled and fitted with utility runs (e.g., plumbing drains and electrical chases); and the slab is poured.
Once the concrete is poured into the holes and trenches, it will need time to cure. During this period, there will be no activity on the construction site
Waterproofing and plumbing are installed.
After the concrete is cured, the crew applies a waterproofing membrane to the foundation walls. They also install drains, the sewer system, water taps, and any plumbing that needs to go into the first-floor slab or basement floor. Then they backfill excavated dirt into the hole around the foundation wall.
Cost Breakdown
This first step is the biggest contributor to the cost to build. There are nearly a dozen factors that can influence the cost of your foundation, from climate and soil type to square footage and labor costs. The national average for foundation costs is around $10,000.
Timeline
Laying the foundation and clearing the way for the house is the most important step, and it can also take a long time to complete. It’s normal to expect this part to take upward of a month.
Inspection #1
When the curing process is complete, a city inspector visits the site to make sure the foundation components are up to code and installed properly. This inspection may be repeated depending on the type of foundation (slab, crawl space, or basement). Your builder will then remove the forms and begin coordinating step No. 2, the framing phase.
2. Complete Rough Framing
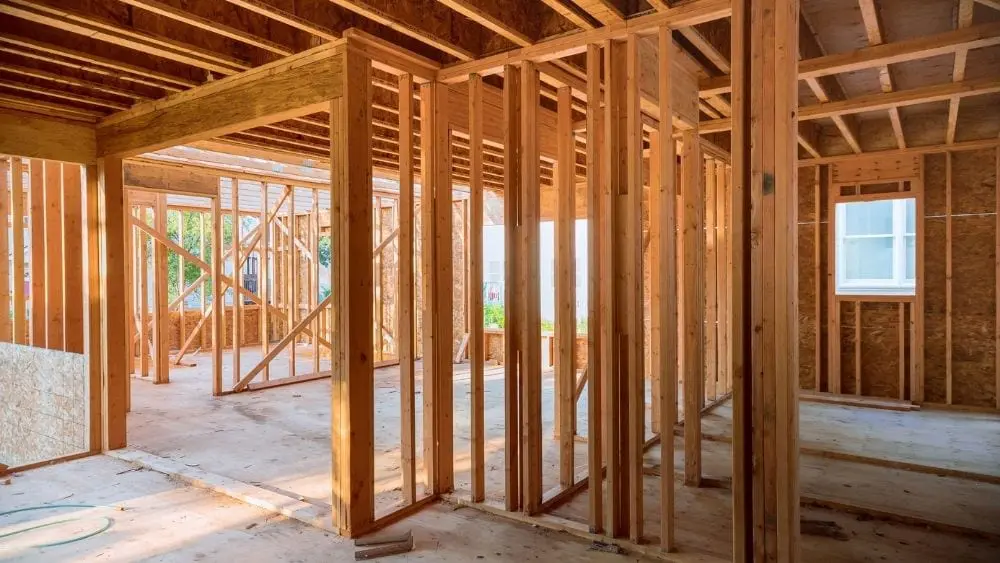
Floor system, walls and roof system are completed.
The floor system, walls, and roof system (collectively known as the shell or skeleton of the house) are completed.
Sheathing is applied to exterior walls and covered with protective wrap.
Plywood or oriented strand board sheathing is applied to the exterior walls and roof, and the windows and exterior doors are installed. The sheathing is then covered with a protective barrier known as a house wrap; it prevents water from infiltrating the structure while allowing water vapor to escape. This reduces the likelihood of mold and wood rot.
Cost Breakdown
The average cost to frame a house is currently $7–$16 per square foot, including labor. Costs can vary depending on the complexity and size of the home and availability of materials, so make sure to speak to your contractor to get an accurate estimate.
Timeline
Framing can take around one to two months, depending on the size and complexity of the home and the weather.
3. Complete Rough Plumbing, Electrical and HVAC
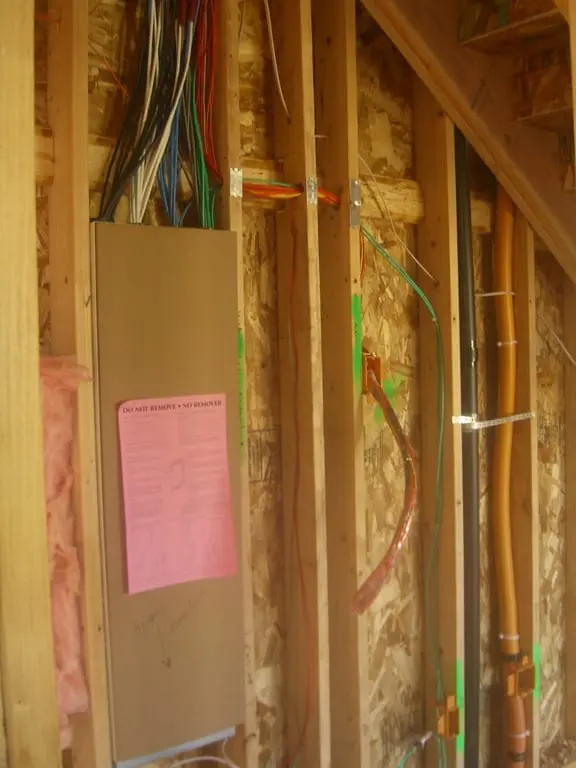
During this stage, the following items are installed:
- Pipes and wires
- Sewer lines and vents
- Water supply lines
- Bathtubs and shower units
- Ductwork for HVAC system
- HVAC vent pipes
- Electrical wiring and receptacles
Once the shell is finished, siding and roofing can be installed. At the same time, the electrical and plumbing contractors start running pipes and wires through the interior walls, ceilings, and floors. Sewer lines and vents, as well as water supply lines for each fixture, are installed. Bathtubs and one-piece shower/tub units are put in place at this point because there’s more room to maneuver large, heavy objects.
Ductwork is installed for the heating, ventilation, and air conditioning (HVAC) system, and possibly the furnace. HVAC vent pipes are installed through the roof, and insulation is installed in the floors, walls, and ceilings.
After the roofing goes on, the house is considered “dried in.” An electrician then installs receptacles for outlets, lights, and switches, and runs wires from the breaker panel to each receptacle. Wiring for telephones, cable TV, and music systems is included in this work.
Note that HVAC ducts and plumbing are usually installed before wiring because it’s easier to run wires around pipes and ducts than vice versa.
Cost Breakdown
Installing rough plumbing in an entire home can cost anywhere from $8,000 to $12,000, or an estimated cost of $4.50 per square foot for new construction.
The national average to wire a new home can be anywhere from $3,269–$6,084 for a 1,000-square-foot house.
Installing an HVAC system with ductwork can cost $7,000 to $16,000, but add-ons can bring this range up to $13,000 to $17,000.
Timeline
While HVAC may only take three to seven days to install, the rest of the mechanicals, from plumbing to electrical, can take two to four weeks. This step shouldn’t be rushed, because getting stuck in inspections can draw out construction even longer and prevent the project from moving forward.
Inspections #2, #3, and #4
Rough framing, plumbing, and electrical and mechanical systems are inspected for compliance with building codes. Most likely these will be three different inspections. At the very least, the framing inspection will be conducted separately from the electrical/mechanical inspections.
At this stage, drywall (also known as plasterboard, wallboard, or gypsum board) is delivered to the building site.
4. Install Insulation
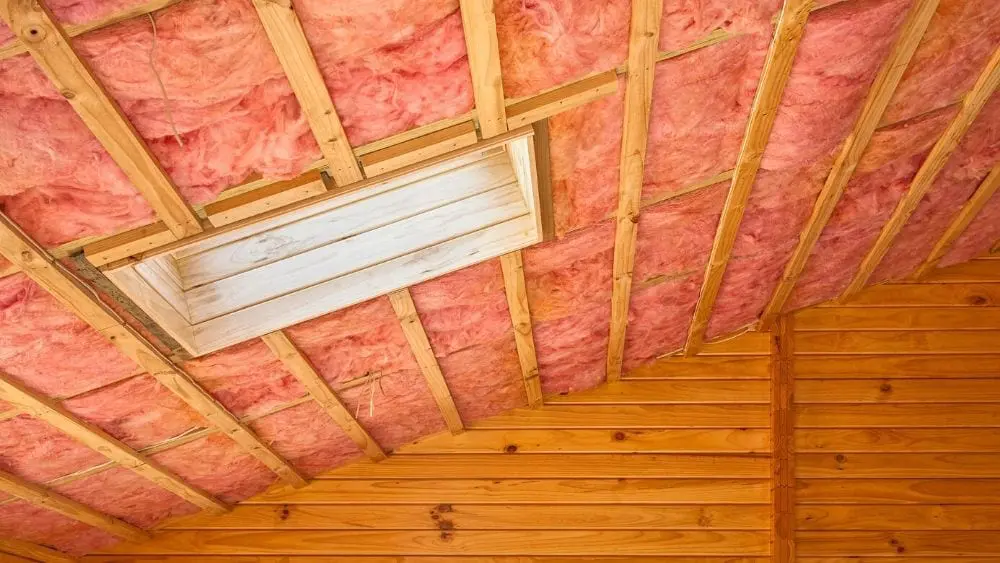
Insulation plays a key role in creating a more comfortable and consistent indoor climate while significantly improving a home’s energy efficiency. One of the most important qualities of insulation is its thermal performance or R-value, which indicates how well the material resists heat transfer. Most homes are insulated in all exterior walls, as well as the attic and any floors that are located above unfinished basements or crawl spaces.
The most common types of insulation used in new homes are fiberglass, cellulose, and foam. Depending on the region and climate, your builder may use mineral wool (otherwise known as rock wool or slag wool), concrete blocks, foam board or rigid foam, insulating concrete forms, spray foam, or structural insulated panels.
Blanket insulation, which comes in batts or rolls, is typical in new home construction. So is loose-fill and blown-in insulation, which is made of fiberglass, cellulose, or mineral wool particles. Another insulation option, liquid foam, can be sprayed, foamed in place, injected, or poured. While it costs more than traditional batt insulation, liquid foam has twice the R-value per inch and can fill the smallest cavities, creating an effective air barrier.
Fiberglass and mineral wool batts and rolls are usually installed in walls, attics, floors, crawl spaces, cathedral ceilings, and basements. Manufacturers often attach a facing such as kraft paper or foil kraft paper to act as a vapor and air barrier. In areas where the insulation will be left exposed, such as basement walls, the batts sometimes have a special flame-resistant facing.
Cost Breakdown
Because of the wide range of insulation types, home sizes, and location climates, the cost of insulation highly varies, ranging from $1.00 to $4.50. The average cost for new home insulation, based on a 2,000-square-foot house, ranges from $2,000 to $10,000; but costs can be as high as $24,000. The good news is that new homes are cheaper to insulate because it’s easier to add when the walls and ceilings are unfinished.
Timeline
On average, insulating the entire house can take one to two weeks. The type of insulation and the home’s size are important to factor in when looking at your timeline.
5. Complete Drywall and Interior Fixtures; Start Exterior Finishes
Drywall is hung and taped.
Drywall is hung on the interior walls and taped so the seams between the boards aren’t visible, and drywall texturing (if applicable) is completed.
- The primer coat of paint is applied.
- Exterior finishes are installed.
Contractors begin installing exterior finishes such as brick, stucco, stone, and siding.
Cost Breakdown
The average cost for drywall is $1.50 to $4.00 per square foot, with the cost per panel ranging from $15 to $60, including labor and materials. Once the drywall is up, the walls and ceiling can be textured, which averages from $0.80 to $2.00 per square foot. It’s cheaper to add texture from scratch, than to remove and retexture walls, so new homeowners are in luck.
The final step to bring it all together is applying the primer coat of paint, which varies depending on the finish. The average cost to paint a room is $300 to $1,000, but a large portion of this cost is labor. If you feel up to it, this is a great project to take on to save money. Homeowners can save up to $500 by painting themselves.
Timeline
Once the framework is up and the walls begin to take form, the house comes together quickly. This step can take anywhere from a few days to several weeks, depending on the size and complexity of the home.
6. Finish Interior Trim; Install Exterior Walkways and Driveway
Doors, windowsills and decorative trim are installed.
Interior doors, baseboards, door casings, windowsills, moldings, stair balusters, and other decorative trim are installed.
- Cabinets, vanities and fireplace mantels are installed.
- The final coat of paint is applied.
The walls get a final coat of paint or are wallpapered where applicable.
In addition, on the exterior, the driveway, walkways, and patios are formed at this stage. Many builders prefer to wait until the end of the project before pouring the driveway because heavy equipment (such as a drywall delivery truck) can damage concrete. But some builders pour the driveway as soon as the foundation is completed so that when homeowners visit the construction site, they won’t get their shoes muddy.
Cost Breakdown
Interior doors average $226 to $824 for installation and materials, including labor. The typical range to install a windowsill is $150 and $700, with full decorative trim averaging around $1,000. All of these aspects can be premade or custom-made, which will influence your costs.
Cabinet costs can vary greatly, depending on the kitchen size, whether they’re custom-made, and what materials are used. The average cost is $7,500, but it can range from as low as $$2,090 up to $40,650 for more elaborate projects.
The average cost per vanity is $100 to $2,600, which includes the sink, faucet, cupboard, and sometimes the mirror and cabinets.
Fireplace mantels are a great way to personalize your home, and the cost for fireplaces, including installation and finishing, ranges from $630-$2,525 if electric, or $3,558 and $14,609 if you opt for gas, masonry, or wood-burning.
Timeline
At this point, several steps can begin to come together at once. Installing the flooring, trim and driveways and walkways can take around one to two months.
7. Install Hard Surface Flooring and Countertops; Complete Exterior Grading
- Ceramic tile, vinyl and wood flooring are installed as well as countertops.
- The exterior finish grading is completed to ensure proper drainage away from the home and to prepare the yard for landscaping.
Cost Breakdown
The cost to install flooring will depend on the type of floors you choose. Hardwood and tile typically cost more than vinyl or linoleum or carpet, but the average cost is around $3,500 per 500-square-foot space.
Similar to flooring, the type of countertops you choose will greatly affect the cost. On average, installing countertops in a new home costs around $1,565 to $3,560, including labor.
Exterior finish grading ranges from around $1,400 to $3,700 depending on labor costs, materials available, and how much yard grading and filling is necessary.
Timeline: The flooring and countertops can be added as the trim and cabinetry come together. The exterior grading can take several days, depending on the size of the crew and the weather.
8. Finish Mechanical Trims; Install Bathroom Fixtures
- Light fixtures, outlets and switches are installed, and the electrical panel is completed.
- HVAC equipment is installed and registers completed.
- Sinks, toilets and faucets are put in place.
Cost Breakdown
Lighting installation costs depend on the fixture type — ceiling lights, recessed lights, pendant lights and so on all have different labor costs. The national average for light fixture installation is $553, but costs can range from $155 – $954.
The average cost to install an electrical panel and wiring is about $550 to $3,000, and it’s highly recommended to hire a licensed electrician for the project.
Installing faucets runs around $161 and $364 on average, while sinks cost $330 to $1,300 and toilets around $400 and $800 on average to install. This is important to keep in mind when planning how many bathrooms you want your new house to have.
Timeline
Once everything is finally looking like a home, installing the finishing touches should only take a few weeks.
9. Install Mirrors and Shower Doors; Finish Flooring and Exterior Landscaping
- Mirrors, shower doors and carpeting are installed and final cleanup takes place.
- Trees, shrubs and grass are planted and other exterior landscaping is completed.
Cost Breakdown
Depending on the size of your bathroom and mirror space, the average cost to install a mirror ranges from about $158 – $469. Shower doors average $700, depending on size, type, and installation.
The average cost for landscaping is around $8,150, but depending on the size of your lawn, labor costs, and design complexity, it could range anywhere from $2,600 to $13,700. Hiring landscape designers and crew members increases the cost.
Timeline
After work is done on the inside of the house, the final cleanup takes around a week, and during this time the exterior landscape can be put together to make the house just as perfect on the outside as it is on the inside.
Inspection #5
A building code official completes a final inspection and issues a certificate of occupancy. If any defects are found during this inspection, a follow-up inspection may be scheduled to ensure that they’ve been corrected. This can sometimes take up to a week.
10. Conduct Final Walk-Through
Your builder will walk you through your new home to acquaint you with its features and the operation of various systems and components and explain your responsibilities for maintenance and upkeep, as well as warranty coverage and procedures.
This is often referred to as a pre-settlement walk-through. It’s also an opportunity to spot items that need to be corrected or adjusted, so be attentive and observant. Examine the surfaces of countertops, fixtures, floors, and walls for possible damage.
Sometimes disputes arise because the homeowner discovers a gouge in a countertop after moving in and there’s no way to prove whether it was caused by the builder’s crew or the homeowner’s movers.
Timeline
The final walk-through can take upward of a week to complete.
A Note on Timelines
The best way to get an accurate timeline on your project is to keep in constant communication with your builder.
A Few Words About Inspections
As you’ve seen, your new home will be inspected periodically during the course of construction. In addition to mandated inspections for code compliance, your builder may conduct quality checks at critical points in the process. The idea is to catch as many potential problems as possible before construction is finished, though some issues may not surface until you’ve lived in the home for a period of time.
A survey of the New Home Source Insights Panel found that most panelists are interested in tracking the progress of their new homes — whether via email communication from the builder, driving by or even through the use of drones. Before you head to the homesite unannounced, talk to your builder early on about attending inspections, with or without your real estate agent. Even if your presence is not required, it’s an opportunity to learn more about what’s behind the walls of your new home and how everything works. If you’re planning to hire your own inspector to do an additional review of the home, notify your builder prior to the start of construction.
In our New Home Learning Center, you’ll find helpful and inspiring articles, slideshows, and videos that will make your new home journey easier and more rewarding.
According to the 2019 Survey of Construction by the U.S. Census Bureau, building a family home can take around seven months. A custom home generally takes more time to build, depending on how elaborate the plans are.
There are several factors that go into building costs, such as labor availability, size of the home, material costs, energy efficiency, and location. The U.S. Census Bureau estimates that the national average cost for a new home in 2024 was $400,500.
Building a new home requires a lot of preparation, and having to make changes mid-construction can become costly. Here are a few boxes to check before starting construction:
– Choose your location or lot. Not all land is suitable to build on, so make sure it meets all regional codes and zoning laws and fits with your lifestyle.
– Before you can start construction, you need to make sure that your budget is set and speak with your bank about the best loan for your situation.
– Unless you’re taking on this monumental project on your own, you’ll need to hire a trustworthy team. Do some research to find your builder; they’ll help you assemble the rest of the team.
– Put the finishing touches on your house plan. The internet is full of great resources to get you started, and you can consult professionals to make sure it’s all feasible.
Every builder is different, but most will call you when any big issues or decisions come up. It’s a good idea to call or email your builder whenever you want to check on the status or have any questions.
You can find and buy land on your own, but it’s a lot easier to let your builder look for a lot. Not only will your builder have experience in buying lots, but they understand the process and know how to save you time and money.
No, unless you’re acting as the contractor on your project, the builder will provide a dumpster and portable toilet for contractors. If you have any questions about where those items will be located or cost factors, ask your builder. Depending on the size, dumpster rental prices range from $300 to $600 a week.
– Weather is a major factor that can affect the construction timeline. Builders can’t work in dangerous conditions, and they don’t want to put the construction materials or workers at risk. Depending on where you live, you can plan to build during a milder season, as long as your contractor is available.
– Availability of materials doesn’t just affect the budget; if there are shortages it can delay construction and extend your timeline.
– Availability of contractors determines when you can start your project. Although it could take time to find the perfect contractor for your project, it’ll pay off to wait for the right builder.
– Inspections are an essential part of the homebuilding process, and often your builder can’t move to the next step without an inspection. Having a clear timeline, open communication with your builder, and planning ahead for inspections can help you stay on track, but some delays may be inevitable.
Other than smaller aesthetic projects, like gardening or painting, the answer is probably no, leave it to the professionals. Projects that you could take on later, depending on your level of DIY experience, include:
– Patios — Your outside space has major potential, from outdoor kitchens and decks to firepits and pools, but some smaller patio projects may be feasible for you to take on yourself.
– Gardening — Planning and planting your garden doesn’t have to be left to the professionals. There are plenty of resources to help get you started or to give your green thumb inspiration.
– Painting — It takes more effort to paint the entire house than to paint one or two rooms, but this is a great step to take on yourself to save money.
– Flooring — If you decide to switch up your flooring from what was originally put down, installing your own flooring can be a great way to save money that would’ve gone to hiring someone else.
Beyond visiting your home site for specific walk-throughs, it’s up to you and your builder to determine how often you should visit. Keep in mind that all visits should be booked in advance with the construction manager and that all safety protocols must be followed.
 Best Kitchen Flooring for a Dazzling Upgrade
Steve
I didn’t see a mention of when windows we’re to be installed?
Before or after Sheetrock?
Before or after HVAC?
Kristine
It’s under step #2
Ilona
I am having a home built on my land, no loan, cash draws. Is builder required to give me keys so I can monitor construction?
Darcy
Absolutely great info. Thank you
Cassandra Massenburg
Do you have a video of the home building process
Jamie Garcia
Hi Cassandra,
Here you go! https://www.youtube.com/watch?v=LrUQZPFGE-k
Raul Flores
Thank you
Linda J Pavlos
At what stage is the roofing finished? The beginning or the end?
Jamie Garcia
Hi Linda,
As the article states, roof systems are completed very near the beginning of the process. You can ask your builder for a timeline specific to your home.
Tamika McGee
Will I need the same inspections and permits to build a 2 story Bungalow tiny home on my own land as I would a regular home?
Jamie Garcia
Hi Tamika,
You can read about the legalities surrounding tiny homes here: https://www.newhomesource.com/learn/tiny-house-legal/ and for more info on tiny homes, check out our tiny homes resource center: https://www.newhomesource.com/learn/tiny-houses/
drakesatterwhite
after the foundation is finished which room is the best to start at?
Jamie Garcia
Hi,
You will need to discuss all building plans with your builder.
jose manuel Velasquez
Can I use different contractors for each step or does it have to be one specific builder?
Jamie Garcia
Hi Jose,
If you choose to build your home on your own, you can certainly select your own, hand-picked team of contractors. However, if you choose to use an established builder, you agree to use that builder’s preferred contractors. You can always have a conversation with your builder regarding this (if, say, you have one particular contractor you want to use but are OK with using the builder’s contractors for the rest), but that is between you and the builder.
Thane roedel
It looks like there are 4 inspections, is there a point in the progress say after stage 4 or 5 that I can finish the house on my own to save money.?
Jamie Garcia
Hi Thane,
This may be possible, but you aren’t likely to find a builder who will agree to this.
Sr
How long it will take to construct a new house from step 6? Just approximate timeline from step 6 to finish
Jamie Garcia
Hello,
It varies from builder to builder. The best thing to do is stay in contact with your builder throughout the process to get updated timelines.
Dillon Wood
Who wrote this web page? I am looking to cite this for a project. Thanks.
Jamie Garcia
Hi Dillon,
The author is Jenna Royall.
Perry
If I built my own house myself, as in I am doing everything my self without a builder, what would be different?
Adam Smith
Building your dream home can be an exciting journey. This step-by-step guide provides invaluable insights, from planning and design to construction and finishing touches, ensuring a smooth and successful home building experience.
Davia
I need a new house it needs to be blue
Mary Louise
Hello – This is a very informative series of articles. Any chance we could get an update on 2023 pricing? Also, in addition to the cost of the average newly-constructed house, could you provide the square footage? thank you
Cody
I’d say new construction today would be $175 to $300 per sq Ft depending on location and complexity. But get multiple quotes.
We’re having a 4300 sq ft home built and we got quotes ranging from high 600s all the way to $1.2 million. Different builders quoting the same home plans.
Ruben
Great work guys, Thanks for all the information.
Me and my sister are planning to build a house in Myrtle Beach SC ( inland area)
We will let you know about the experience. Thank you
Earline Fitzgerald
I’m not building a home but I’m writing a novel where the integral characters are the designer, architect, & construction company. I’d done a lot of research on jobs & responsibilities, different types of insulation, stick vs steel, solar, in floor heating, skylights, smart homes, costs, etc. But I realized I didn’t know all the steps from building through completion and this site gives it to me. T
Thank you.
Sheila
When does the septic tank and field get dug / constructed?
Cody
Ours got installed just before the insulation and drywall.
Abi
Hi, for what state is this? I am in Houston, Texas. Are these supposed to be same steps?
Thomas E Beck
We bought our existing 1973 view home N of Seattle on Whidbey Island in 2003. We rebuild bathroom and completed downstairs room. We replaced all interior doors with custom doors. Installed 2,700 ft2 of tile, hardwood and synthetic floor ourselves. Completed board and batton on entire exterior. Rebuilt 3 large decks. Repainted intire interior, etc. etc.
So for our new second 1,400 ft2 home we can do a lot of the work ourselves. We are using SIPs. Originally we had a 2,800 ft2 2nd home designed until we realized it could easily cost a million dollars. That is obscene. Your step by step process will not require most of the framing and insulation steps. I watched the county build a stick frame new fire station and it not only took forever to complete but seems archaic design wise. SIPs and so much easier and faster.